Chainsaw Sawmill Guide: A Comprehensive Overview
Embark on a journey to transform your chainsaw into a portable sawmill, unlocking the potential to craft lumber directly from logs. This guide
provides essential knowledge, covering setup, techniques, and optimization for successful milling operations, empowering both hobbyists and professionals.
Understanding Chainsaws for Milling
Selecting the right chainsaw is paramount for efficient milling. Unlike standard woodcutting, milling demands sustained power and torque. Consider chainsaws with larger displacement engines – 60cc or higher – for consistent performance through dense wood. Bar length should align with your anticipated log diameters; a longer bar facilitates milling wider slabs.
Crucially, understand your chainsaw’s capabilities. Not all chainsaws are suitable; those designed for occasional use may overheat or lack the necessary durability. Modifications might be needed, such as installing a different sprocket for increased torque. Familiarize yourself with the chainsaw’s components, including the chain brake, throttle control, and anti-vibration system.
Proper chain maintenance is also vital. Sharpening the chain frequently ensures clean cuts and reduces strain on the engine. Using a specialized milling chain, designed with a more aggressive raker angle, significantly improves cutting efficiency and surface finish. Remember, a well-maintained chainsaw is a safe and productive chainsaw.
Chainsaw Specifications for Milling
Optimal chainsaw specifications for milling hinge on engine power, bar length, and chain type. A minimum of 60cc engine displacement is recommended, with 70cc or higher preferred for larger logs and frequent use. Bar length should exceed the widest anticipated cut – typically 24 to 36 inches, but potentially longer for specialty milling.
Chain pitch is also critical; .404 pitch chains are favored for their durability and cutting efficiency in hardwoods. Consider a milling chain with a hardened guide bar and aggressive rakers. Sprocket size impacts torque – a smaller sprocket increases torque but reduces chain speed, beneficial for milling.
Furthermore, assess the chainsaw’s weight and ergonomics. Milling can be physically demanding, so a balanced and comfortable chainsaw reduces fatigue. Look for features like anti-vibration systems and adjustable handles. Finally, ensure the chainsaw has a reliable chain brake and safety features for secure operation.
Essential Chainsaw Mill Types
Several chainsaw mill types cater to diverse needs and budgets. The Alaskan sawmill, a popular choice, clamps directly onto the chainsaw bar, guiding it along a pre-mounted track. Granberg mills offer a similar function but often feature a more refined design and adjustable components for precise cuts.
Ladder mills represent a budget-friendly option, utilizing a ladder as a guide rail. These are suitable for smaller projects and occasional use. Portable sawmill attachments transform a chainsaw into a more capable milling tool, offering increased accuracy and efficiency.
Each mill type presents unique advantages. Alaskan mills excel in portability and versatility, while Granberg mills prioritize precision. Ladder mills are cost-effective, and attachments bridge the gap between basic and professional setups. Selecting the appropriate mill depends on log size, milling frequency, and desired lumber quality.
Alaskan Sawmill: Features and Benefits
The Alaskan sawmill stands as a widely recognized and favored choice among chainsaw milling enthusiasts, celebrated for its robust simplicity and portability. Its core feature is a durable steel frame that securely clamps onto the chainsaw bar, effectively converting it into a rudimentary yet functional sawmill.
Key benefits include its adaptability to various chainsaw sizes and its relatively low cost compared to more complex milling systems. Alaskan mills enable users to mill logs of substantial diameter, producing boards and timbers for construction or woodworking projects. The design prioritizes ease of setup and operation, making it accessible to beginners.
However, achieving perfectly straight and consistent cuts requires practice and careful attention to technique. Despite this, the Alaskan sawmill remains a practical and efficient solution for those seeking an affordable entry point into the world of chainsaw milling.
Granberg Sawmill: Design and Applications
Granberg sawmills represent a refined approach to chainsaw milling, distinguished by their emphasis on precision and versatility. Unlike the Alaskan mill’s simpler design, Granberg systems often incorporate features like adjustable side rails and depth gauges, facilitating more accurate and consistent cuts.
These mills are available in various configurations, catering to different chainsaw sizes and milling needs. A key design element is the sled system, which allows for smooth and controlled movement along the log, minimizing binding and maximizing efficiency. Granberg mills excel in applications demanding tighter tolerances and higher-quality lumber.
While generally more expensive than Alaskan mills, the increased precision and ease of use often justify the investment for serious woodworkers and those seeking professional-grade results. They are particularly well-suited for milling dimensional lumber and specialty wood products.
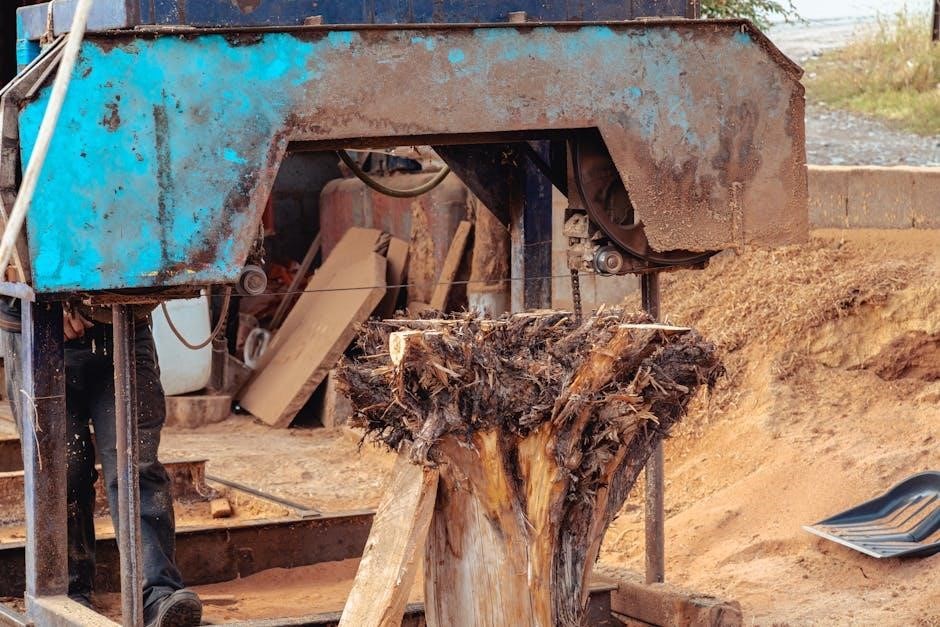
Portable Sawmill vs. Chainsaw Mill
Choosing between a portable sawmill and a chainsaw mill hinges on your milling volume, budget, and desired lumber quality. Portable sawmills, typically gas or electric-powered, offer significantly higher throughput and produce consistently dimensioned lumber, ideal for commercial operations or substantial projects.
However, they represent a considerable investment – often exceeding several thousand dollars – and require a dedicated space for operation and maintenance. Chainsaw mills, conversely, are a far more affordable entry point, utilizing a chainsaw you may already own. They excel in portability, allowing milling in remote locations inaccessible to larger sawmills.
While chainsaw mills demand more physical effort and yield lumber with potentially greater variation, they are perfect for small-scale projects, hobbyists, or those needing to process occasional logs. The initial cost is lower, but the milling process is slower and requires greater operator skill.

Setting Up Your Chainsaw Mill
Proper setup is paramount for safe and efficient chainsaw milling. Careful planning, detailed attention, and consistent practice are essential to create a successful operation.
Site Selection for Chainsaw Milling
Choosing the right location is fundamental to a smooth and productive chainsaw milling experience. Prioritize a level, stable surface to ensure consistent cuts and minimize strain on both the mill and the operator; Ample space around the log is crucial for maneuvering and handling lumber safely.
Consider proximity to a power source if using an electric chainsaw, or ensure adequate ventilation if operating a gas-powered model. Avoid areas with obstructions like rocks, roots, or low-hanging branches that could impede movement or pose a safety hazard.
Furthermore, think about lumber storage; ideally, the milling site should be close to where the finished lumber will be stacked and dried. A well-drained area prevents mud and slippery conditions, enhancing safety and accessibility. Finally, assess the surrounding environment for potential fire risks and take appropriate precautions.
Power Requirements and Considerations
Determining adequate power is vital for efficient chainsaw milling. Electric chainsaws demand a reliable power source, often requiring a heavy-duty extension cord capable of handling the amperage draw. Consider the distance from the power outlet and potential voltage drop, which can reduce chainsaw performance. A generator provides flexibility for remote locations, but ensure it delivers sufficient wattage to consistently power the saw under load.
Gas-powered chainsaws offer portability but necessitate a consistent fuel supply and proper ventilation due to exhaust fumes. Regularly check fuel levels and maintain the chainsaw’s engine for optimal performance.
Regardless of the power source, prioritize safety by using Ground Fault Circuit Interrupters (GFCIs) with electric saws and adhering to all manufacturer’s recommendations for fuel handling and engine maintenance; Proper power management maximizes milling speed and minimizes downtime.
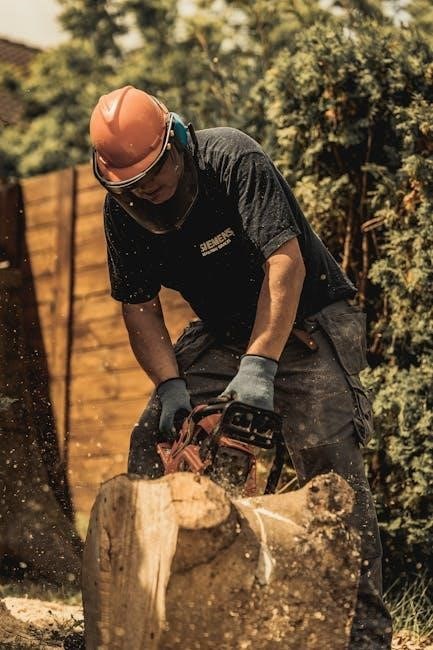
Safety Protocols for Chainsaw Milling
Chainsaw milling demands strict adherence to safety protocols. Always wear appropriate personal protective equipment (PPE), including a helmet with face shield, hearing protection, safety glasses, heavy-duty gloves, and steel-toed boots. Be acutely aware of kickback hazards and maintain a firm grip on the chainsaw. Ensure a clear work area, free from obstructions and bystanders.
Inspect the chainsaw and mill thoroughly before each use, checking for loose parts or damage. Never operate a damaged chainsaw. Understand emergency shutdown procedures and keep a first-aid kit readily accessible. When working with logs, be mindful of potential rolling or shifting, securing them properly.
Prioritize situational awareness and avoid milling in adverse weather conditions. Proper training and a thorough understanding of the equipment are paramount for safe and efficient operation.
Assembling the Chainsaw Mill
Begin assembly on a stable, level surface, carefully laying out all components. Typically, this involves attaching the guide rails to support structures, ensuring they are perfectly parallel. Next, mount the sled, which will house the chainsaw, onto the rails, verifying smooth and consistent movement. Secure all bolts and fasteners, double-checking for tightness.
For ladder-style mills, meticulously connect the ladder sections, ensuring proper alignment and stability. Attach anchors to the log, preparing for the milling process. Pay close attention to the manufacturer’s instructions, as assembly procedures vary between mill types – Alaskan, Granberg, or others.
A correctly assembled mill is crucial for accurate cuts and operator safety. Take your time and verify each step before proceeding.
Attaching the Chainsaw to the Mill

Securely mounting the chainsaw is paramount for both precision and safety. Begin by positioning the chainsaw’s bar along the designated slot on the mill’s sled. Ensure the drive sprocket aligns correctly with the mill’s drive mechanism. Fasten the chainsaw using the provided clamps or bolts, tightening them firmly but avoiding over-tightening, which could damage the saw.
Verify the chainsaw’s chain is properly tensioned before operation. The bar should move freely within the slot, without excessive play. Double-check that all safety features, such as the chain brake, are functioning correctly. A loose or improperly attached chainsaw can lead to inaccurate cuts and potentially dangerous kickback.
Regularly inspect the attachment points throughout the milling process to maintain a secure connection.
Adjusting the Mill for the First Cut
Precise adjustment is crucial for achieving accurate and consistent cuts. Begin by setting the desired lumber thickness using the mill’s adjustable depth gauge. Ensure the gauge is securely locked in place before commencing the cut. Carefully align the mill with the log, ensuring the cutting path follows the desired board orientation.
For the initial cut, it’s advisable to take a shallow pass, removing only a small amount of material. This allows for fine-tuning of the mill’s alignment and minimizes the risk of binding or kickback. Gradually increase the cutting depth with subsequent passes, maintaining a consistent feed rate.
Continuously monitor the cut for straightness and depth, making minor adjustments as needed. A smooth, controlled first cut sets the foundation for all subsequent milling operations.

Chainsaw Milling Techniques
Mastering milling techniques involves initial cuts for a flat surface, followed by subsequent passes to achieve the desired lumber dimensions. Log positioning and consistent depth are key.
Milling Techniques: Initial Cuts
The first cut is paramount for establishing a level and consistent milling surface. Begin by carefully positioning the log, ensuring it’s stable and secure. Initiate a shallow cut, focusing on removing only a small amount of material – approximately 1/8 to 1/4 inch deep. This initial pass creates a flat reference point for guiding subsequent cuts.
Maintain a steady and even feed rate, allowing the chainsaw to do the work. Avoid forcing the cut, as this can lead to uneven results and increased strain on the equipment. Prioritize a straight line, utilizing the sawmill guide as a reference. Regularly check for levelness throughout the cut, making minor adjustments as needed.
After completing the initial cut, inspect the resulting surface. Address any inconsistencies or high spots before proceeding. This foundational step significantly impacts the accuracy and quality of the final lumber, ensuring a smooth and efficient milling process. A well-executed first cut sets the stage for successful milling.
Milling Techniques: Subsequent Cuts
Following the initial cut, subsequent passes incrementally increase the lumber’s thickness. Adjust the mill’s depth setting to remove another 1/8 to 1/4 inch with each pass, maintaining a consistent feed rate and straight line. Monitor the chainsaw’s performance, listening for any signs of strain or bogging down. Reduce the feed rate if necessary to prevent overheating or damage.
Continuously assess the flatness of the milled surface, utilizing a straightedge to identify any deviations. Minor adjustments to the mill’s alignment can correct these imperfections. Remember to maneuver the log strategically, rotating it as needed to access different sections and optimize lumber yield.
As you approach the desired lumber thickness, reduce the depth of each cut to minimize tear-out and achieve a smoother finish. Patience and precision are key to producing high-quality lumber. Consistent technique yields optimal results, transforming logs into valuable timber.

Log Maneuvering and Positioning
Efficient log handling is paramount for safe and productive chainsaw milling. Before initiating any cuts, carefully assess the log’s shape, identifying any inherent bends, twists, or defects. Position the log to maximize lumber yield and minimize waste, considering the grain direction and desired board dimensions.
Utilize rollers, levers, or other mechanical aids to rotate and reposition the log as needed. Avoid direct physical contact with the log during milling, as kickback can occur. Ensure the log is securely supported to prevent rolling or shifting during operation. A stable base is crucial for accurate cuts.
Strategic maneuvering allows access to different sections of the log, optimizing lumber recovery. Regularly adjust the log’s position to maintain a consistent cutting angle and depth. Prioritize safety throughout the process, always being aware of the log’s movement and potential hazards.
Maintaining Consistent Depth and Straightness
Achieving precise cuts demands unwavering focus on maintaining consistent depth and straightness throughout the milling process. A steady feed rate is crucial; avoid forcing the chainsaw, allowing the chain to do the work. Monitor the mill’s guide rails frequently, ensuring they remain level and aligned to prevent deviations.
Pay close attention to the chainsaw’s plunge depth, making incremental adjustments as needed to maintain the desired board thickness. Utilize depth gauges or markings on the mill to ensure accuracy. Consistent pressure along the guide rail is vital for a straight cut, minimizing wandering or curving.
Regularly inspect the chainsaw chain for sharpness and proper tension. A dull chain will require more force, increasing the risk of inconsistent cuts. Practice smooth, controlled movements, and avoid abrupt changes in speed or direction. Patience and precision are key to achieving professional-quality lumber.

Optimizing Your Milling Operation
Maximize efficiency and profitability by focusing on waste reduction, lumber yield, and proactive troubleshooting. Regular maintenance ensures peak performance, transforming your milling into a streamlined, rewarding endeavor.
Waste Management in Chainsaw Milling
Effective waste management is crucial for both environmental responsibility and maximizing the value of your milling operation. Chainsaw milling inherently produces significant amounts of sawdust and slabwood – the outer portions of the log removed to reach the desired lumber dimensions. Proper handling of these byproducts is essential.

Consider the potential for repurposing sawdust. It can be used as animal bedding, garden mulch, or even as a fuel source for wood-burning stoves, though safety precautions regarding moisture content and combustion are vital. Larger slabwood pieces can be split for firewood or utilized in rustic woodworking projects.
Responsible disposal of unusable waste is also key. Avoid simply piling it up, as this can attract pests and create a fire hazard. Explore local options for wood waste recycling or composting. Minimizing waste not only reduces environmental impact but can also generate additional income streams, contributing to a more sustainable and profitable milling operation. Careful planning and resourcefulness are paramount.
Maximizing Lumber Yield
Achieving optimal lumber yield from each log is paramount for profitability and resource efficiency in chainsaw milling. Careful log assessment is the first step – identifying defects like knots, rot, and sweep allows for strategic cutting plans. Prioritize cutting boards with the highest value and minimizing waste.
Employing proper milling techniques significantly impacts yield. Consistent depth and straightness are crucial, as are precise cuts that follow the natural contours of the log. Consider utilizing different milling patterns, such as quarter sawing or rift sawing, to maximize the amount of clear lumber obtained, depending on the log’s characteristics and desired end-use.
Optimizing blade selection and maintaining a sharp chain are also vital. A dull chain leads to increased waste and reduced efficiency. Regularly inspect and adjust your mill to ensure accurate cuts. By combining careful planning, skillful execution, and diligent maintenance, you can substantially increase your lumber yield and overall milling success.
Troubleshooting Common Milling Issues
Encountering challenges is inevitable during chainsaw milling. One frequent issue is blade binding, often caused by improper tension or sawdust buildup. Regularly clean the guide rail and ensure correct chain tension to prevent this. Another common problem is inconsistent cut depth, typically stemming from uneven rail support or a worn mill carriage – verify rail alignment and carriage condition.
Warping or twisting lumber can occur due to internal stresses within the log. Proper log handling and strategic cutting patterns can mitigate this. If the chainsaw mill vibrates excessively, check for loose components or an unbalanced chain. Addressing these issues promptly prevents further complications.
Finally, difficulty maintaining a straight cut often indicates a bent guide rail or a misaligned chainsaw. Regularly inspect and adjust your equipment. Remember, preventative maintenance and a systematic approach to problem-solving are key to overcoming milling obstacles and achieving consistent results.
Chainsaw Mill Maintenance and Care

Prolonging the life of your chainsaw mill requires diligent maintenance. After each use, thoroughly clean the mill, removing sawdust and debris from the guide rail, carriage, and chainsaw bar. Inspect the guide rail for bends or damage, and address any issues promptly. Regularly lubricate all moving parts with a suitable grease or oil to ensure smooth operation and prevent rust.
Sharpen your chainsaw chain frequently for optimal cutting performance and reduced strain on the engine. Check the chain tension before each use and adjust as needed. Inspect the chainsaw bar for wear and tear, and replace it when necessary. Store the mill in a dry, protected environment to prevent corrosion.
Periodically examine the mill’s fasteners and tighten any loose bolts or screws. Proper care and maintenance not only enhance performance but also ensure safety during operation, maximizing your investment and enjoyment.