Installation Guide
Proper installation is crucial for optimal performance. Ensure the dryer is placed on a level surface, venting system is correctly installed, and all connections are secure. Follow the manual’s step-by-step instructions to avoid issues and ensure safety.
1.1 Pre-Installation Requirements
Before installing your Kenmore Model 970 dryer, ensure the installation site meets specific requirements. Choose a well-ventilated, dry area away from direct sunlight and heat sources. The floor must be level and sturdy to support the dryer’s weight. Gather necessary tools and materials, such as a measuring tape, level, screws, and venting kit (part number PS3408299). Ensure the electrical connection meets the dryer’s 240-volt requirement. Proper venting is essential; use rigid metal ducts to avoid lint buildup and ensure compliance with local codes. Unpack the dryer carefully to prevent damage. Double-check all parts and accessories are included. Clear the area around the installation site for easy access. Refer to the manual for detailed diagrams and guidelines to ensure a safe and efficient setup. Proper preparation will guarantee optimal performance and longevity of your Kenmore dryer.

1.2 Step-by-Step Installation Instructions
Begin by carefully unpacking the Kenmore Model 970 dryer from its packaging, ensuring no damage occurs during removal. Place the dryer on a sturdy, level surface in a well-ventilated area. Next, connect the venting system using a rigid metal duct, ensuring all connections are secure and airtight to prevent lint buildup. Attach the venting kit (part number PS3408299) to the dryer’s exhaust outlet, following the manufacturer’s guidelines. Plug the dryer into a 240-volt electrical outlet, ensuring the cord is safely secured. Use a level tool to adjust the dryer’s feet, ensuring it is perfectly balanced. Tighten all screws and bolts to ensure stability. Finally, test the dryer by running a short cycle to ensure proper operation. Refer to the manual for detailed diagrams and additional guidance to ensure a safe and efficient installation process.
1.3 Leveling the Dryer
Proper leveling of your Kenmore Model 970 dryer is essential for optimal performance and safety. Begin by placing the dryer on a firm, level surface. Use a level tool to check the balance of the unit. Adjust the dryer’s feet by turning them clockwise or counterclockwise until the dryer is perfectly horizontal. Ensure all four feet are in contact with the floor to prevent instability. Once leveled, tighten the locking nuts to secure the feet in place. A properly leveled dryer reduces vibration and noise during operation. If the dryer is installed on a uneven floor, consider using shims or adjustable feet to achieve proper alignment. Double-check the level after installation to ensure the dryer is stable and balanced. This step is crucial for efficient operation and to prevent potential damage to the appliance or surrounding area.
1.4 Venting Requirements and Recommendations
Proper venting is critical for safe and efficient operation of your Kenmore Model 970 dryer. Use a 4-inch diameter vent duct made of rigid metal or flexible metal tubing. Avoid using plastic or foil-covered ducts, as they can pose fire hazards. Ensure the vent system is free of lint and debris to maintain airflow. The vent should terminate outside the building, ideally at least 3 feet away from windows, doors, and air conditioning units to prevent lint accumulation. Regularly inspect and clean the venting system to prevent blockages. The total vent length should not exceed 25 feet, with no more than two 90-degree elbows, to maintain proper airflow. Install a vent hood with a backdraft damper to prevent cold air from entering the duct. Proper venting ensures efficient drying, reduces energy consumption, and minimizes the risk of fire hazards.

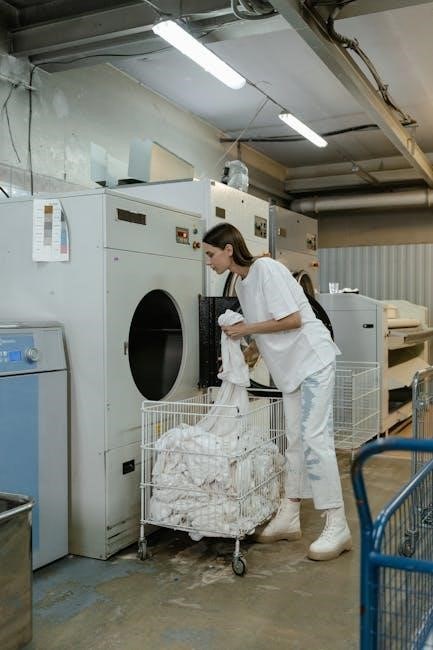
Operating the Dryer
Start by selecting the appropriate drying cycle and options for your load. Ensure the lint filter is clean before starting. Monitor the cycle to ensure optimal drying and energy efficiency.
2.1 Understanding the Control Panel
The Kenmore 970 dryer features an intuitive control panel designed for easy operation. Key components include a cycle selector knob, temperature settings, and option buttons for features like delay start or steam drying. LED indicators provide visual feedback on the selected cycle, remaining time, and any active options. Start/Stop and Pause/Cancel buttons allow you to manage the drying process conveniently. Familiarize yourself with each button and its function to optimize your drying experience. Always refer to the manual for detailed explanations of advanced features and settings.
2.2 Selecting the Right Drying Cycle
Selecting the appropriate drying cycle ensures optimal results for different fabric types. The Kenmore 970 dryer offers various cycles, such as Normal, Heavy Duty, Delicate, and Quick Dry. Choose Normal for everyday loads and Heavy Duty for bulky or heavily soiled items. For gentle care, select Delicate to prevent fabric damage. The Quick Dry option is ideal for small loads needing rapid drying. Some models also feature a Steam Refresh cycle to reduce wrinkles and odors. Always check the fabric care label to ensure the chosen cycle aligns with the material. Adjusting the cycle based on load size and fabric type ensures efficient drying and helps maintain clothing quality. Proper cycle selection enhances performance and extends the life of your garments. Refer to the manual for detailed cycle descriptions and recommendations. Regularly cleaning the lint filter also improves drying efficiency.
2.3 Starting and Stopping the Dryer

To start the dryer, ensure the door is fully closed and the lint filter is clean. Press the Power button to activate the control panel, then select the desired cycle using the cycle selector knob or touchscreen interface. Once the cycle is chosen, press Start to begin the drying process. The dryer will initiate, and the display will show the remaining time. To stop the dryer mid-cycle, press and hold the Stop or Cancel button until the machine powers off. Always ensure the door is opened carefully after stopping, as the interior may be hot. For models with a door switch, the dryer will automatically stop when the door is opened. Regularly cleaning the lint filter before starting ensures efficient operation. Refer to the manual for specific start/stop instructions for your Kenmore 970 model.
2.4 Monitoring the Drying Cycle
Monitoring the drying cycle on your Kenmore 970 dryer is straightforward. The digital display screen provides real-time updates, showing the remaining time and cycle status. Use the Cycle Status indicators to track progress, such as Sensing, Heating, or Cooling. The Remaining Time feature helps you plan your tasks. Check the Moisture Sensors to ensure they are functioning correctly, as they adjust drying time based on load moisture. If you need to pause or check the load, press Pause/Cancel to stop the cycle temporarily. Always ensure the Lint Filter is clean before starting a cycle for optimal performance. For energy efficiency, consider using the Auto-Dry feature, which stops the cycle once clothes are dry. Refer to your manual for specific monitoring tips tailored to your Kenmore 970 model.

Maintenance and Care
Regular maintenance ensures efficiency and longevity. Clean the lint filter after each use, inspect and clean the venting system annually, and wipe down the exterior with a damp cloth. Check the moisture sensors for proper function and run diagnostic tests if issues arise. Replace worn-out parts promptly to maintain performance.
3.1 Cleaning the Lint Filter
Cleaning the lint filter is essential for maintaining your Kenmore dryer’s efficiency and safety. After each use, remove the lint filter and gently brush off accumulated lint with your hands or a soft brush. For tougher residue, wash the filter with mild soap and warm water, then allow it to air dry completely before reinserting. Never operate the dryer without the lint filter, as this can cause reduced airflow, higher energy consumption, or even fire hazards. Regular cleaning also prevents lint buildup in the venting system, which can lead to performance issues or safety risks. Always ensure the filter is securely in place before starting a new cycle. This simple maintenance step significantly improves drying performance and ensures optimal operation of your Kenmore dryer.
3.2 Cleaning the Dryer Vent
Cleaning the dryer vent is crucial for maintaining proper airflow and ensuring safe operation. Over time, lint and debris accumulate in the vent, which can lead to reduced efficiency, higher energy bills, and potential fire hazards. To clean the vent, disconnect it from the dryer and exterior vent outlet; Use a dryer vent brush or a vacuum cleaner with a long hose attachment to remove lint and debris; Inspect the vent for any blockages or kinks and repair or replace damaged sections. Clean the vent at least once a year or more frequently if you notice reduced drying performance. Ensure all connections are securely reattached after cleaning. Regular vent maintenance helps prevent overheating, improves drying times, and reduces the risk of fires. Always follow the manufacturer’s guidelines for cleaning and maintenance.
3.3 Cleaning the Exterior
Regularly cleaning the exterior of your Kenmore dryer helps maintain its appearance and functionality. Use a soft, damp cloth to wipe down the exterior surfaces, paying attention to areas around buttons and knobs where dust and lint may accumulate. Avoid using harsh chemicals, abrasive cleaners, or excessive water, as they may damage the finish or harm electrical components. For tougher stains or spills, mix a small amount of mild detergent with warm water, dip a cloth into the solution, and gently scrub the area. Avoid soaking the surface. After cleaning, use a dry cloth to wipe away moisture and prevent streaks. Regular cleaning not only keeps your dryer looking new but also prevents dust buildup, which can affect performance. Always unplug the dryer before cleaning to ensure safety.
3.4 Running Diagnostic Tests
Running diagnostic tests on your Kenmore dryer model 970 helps identify and resolve issues before they become major problems. Start by ensuring the dryer is unplugged to avoid any accidental start-ups. Access the diagnostic mode by pressing and holding specific buttons, typically the “Start” and “Help” buttons simultaneously for a few seconds. Once in diagnostic mode, the dryer will display error codes or perform self-tests to check components like the motor, heating element, and sensors. Refer to the manual or the display for a list of error codes and their meanings. If a specific issue is detected, the dryer may provide guidance for resolving it. After completing the tests, restart the dryer to ensure it operates normally. Regular diagnostic checks can prevent unexpected breakdowns and ensure optimal performance. Always consult the service manual for detailed instructions and interpretations of test results.
3.5 Replacing Parts and Accessories
Replacing parts and accessories on your Kenmore dryer model 970 ensures optimal performance and longevity. Always use genuine Kenmore parts to guarantee compatibility and safety. Start by identifying the part you need using the model number and part diagrams provided in the manual or online resources. Common replacements include the lint filter, dryer belt, and heating element. Before starting, unplug the dryer to avoid electrical hazards. Use a screwdriver to access internal components, following the manual’s instructions for disassembly. Once the old part is removed, install the new one securely, ensuring proper alignment and connections. Reassemble the dryer and test it to confirm the repair. If unsure, consult the manual or contact a professional technician. Regularly replacing worn-out parts prevents breakdowns and maintains efficient operation. Keep track of replacement dates to stay ahead of maintenance needs.

Troubleshooting Common Issues
Identify issues like no heat, strange noises, or failure to start. Refer to the manual for diagnostic tests and solutions. Address problems promptly to ensure safe and efficient operation.
4.1 Diagnosing No Heat or Low Heat Issues
If your Kenmore 970 dryer is producing no heat or low heat, start by checking the power supply and ensuring the dryer is properly plugged in. Verify that the circuit breaker hasn’t tripped. Inspect the venting system for blockages, as restricted airflow can prevent proper heating. Check the lint filter and clean it if necessary. Consult the manual for diagnostic tests to identify faulty components like the heating element or thermal sensors. If issues persist, consider replacing worn-out parts such as the belt or idler assembly. Regular maintenance, like cleaning the vent and ensuring proper installation, can prevent such problems. Always refer to the manual for specific troubleshooting steps and safety precautions to avoid further damage or hazards.
4.2 Addressing Strange Noises
Strange noises in your Kenmore 970 dryer can indicate worn or loose parts. Start by identifying the type of noise—scraping, squeaking, or rattling. Check for blockages in the drum or venting system, as debris can cause unusual sounds. Inspect the dryer belt for cracks or misalignment and ensure it’s properly connected to the idler assembly. Lubricate moving parts like rollers and glides if necessary. If the noise persists, replace worn components such as the drum rollers or belt. Consult the manual for diagnostic procedures and part replacement guides. Proper installation and leveling of the dryer can also prevent vibration-related noises. Regular maintenance, like cleaning the lint filter and vent, can reduce the likelihood of such issues. Always refer to the manual for specific troubleshooting steps to ensure safe and effective repairs.
4.3 When the Dryer Fails to Turn On
If your Kenmore 970 dryer fails to turn on, start by checking the power supply. Ensure the dryer is properly plugged into a functioning outlet and that the circuit breaker or fuse hasn’t tripped. Verify that the dryer door is closed completely, as an open door can prevent operation. Check the child lock feature to ensure it’s not activated. If the issue persists, inspect the power cord for damage or loose connections. Consult the manual for diagnostic tests, such as checking the thermal sensors or start switch. If the dryer still doesn’t power on, it may indicate a faulty control board or motor. Refer to the troubleshooting guide in the manual for further assistance or contact a professional technician if needed.
4.4 Reducing Excessive Vibration
Excessive vibration during operation can be resolved by ensuring the dryer is properly leveled. Check and tighten the leveling feet at the base of the unit to stabilize it on the floor. If the dryer is not evenly balanced, it may vibrate excessively. Additionally, inspect the dryer belt for proper alignment and tension, as a misaligned or loose belt can cause imbalance. Clean the lint filter and venting system to ensure proper airflow, as clogs can lead to uneven operation. If the issue persists, check for worn or damaged rollers or idler pulleys, which may need replacement. Refer to the manual for guidance on diagnosing and replacing parts. Ensuring a stable and balanced installation will significantly reduce vibration and improve performance.

Safety Precautions
Always follow safety guidelines to prevent accidents. Ensure proper installation, avoid flammable materials nearby, keep children away, and maintain the dryer regularly for safe operation.
5.1 General Safety Tips
Adhere to these guidelines to ensure safe operation of your Kenmore dryer. Always install the dryer on a level surface and follow the manual’s installation instructions. Keep flammable materials, such as curtains or bedding, away from the dryer. Never leave the dryer unattended during operation, especially when drying items like towels or bulky fabrics. Regularly clean the lint filter and venting system to prevent fires. Ensure the venting system is properly installed and free from obstructions. Keep children away from the dryer and supervise them when they are nearby. Avoid overloading the dryer, as this can cause excessive heat buildup. Finally, always unplug the dryer when performing maintenance or repairs. Consult the manual for additional safety recommendations tailored to your Kenmore dryer model.
5.2 Ensuring Child Safety

Child safety is a top priority when operating your Kenmore dryer. Ensure children are kept at a safe distance from the appliance to avoid accidental injuries. Supervise children closely when they are near the dryer, as they may not understand the risks associated with its operation. Use the child safety lock feature on the control panel to prevent accidental start-ups. Teach children not to play with or insert objects into the dryer, as this can lead to damage or harm. Keep the dryer door closed when not in use to prevent children from accessing the interior. Regularly educate your children about the dangers of the dryer and the importance of treating it with care. Always refer to the manual for additional child safety recommendations specific to your Kenmore dryer model.
5.3 Preventing Fires
Preventing fires is essential for safe dryer operation. Regularly clean the lint filter and venting system to avoid lint buildup, which can ignite and cause fires. Ensure the dryer vent is properly installed and free from obstructions. Avoid drying flammable materials, such as rags soaked in volatile substances, as they can catch fire during the cycle. Never leave the dryer unattended while it is running, especially if you have a gas model. Keep the area around the dryer clear of clutter and flammable items. Follow the manufacturer’s guidelines for proper venting and installation to minimize fire risks. Inspect the venting system annually and replace damaged or corroded parts. Always ensure the dryer is installed on a level surface to prevent vibration, which can increase the risk of fire.
5.4 Proper Usage Guidelines
Proper usage of your Kenmore dryer model 970 ensures safe and efficient operation. Always ensure the dryer is installed on a stable, level surface to prevent vibration and potential damage. Avoid overloading the dryer, as this can reduce efficiency and cause mechanical strain. Use the correct cycle and heat setting for the type of fabric being dried to prevent damage to clothing and the appliance. Never dry items containing plastic, foam, or rubber, as they can melt or catch fire. Keep the lint filter clean before and after each use to maintain airflow and reduce fire risks. Ensure the venting system is clear and properly connected to prevent moisture buildup and carbon monoxide leaks. Do not leave the dryer unattended during operation, especially when drying delicate or special-care items. Always refer to the manual for specific guidelines on fabric types and drying times.