Welcome to our guide on ICONSIGN Lash Tint Instructions! This comprehensive tutorial will walk you through enhancing your lashes with a semi-permanent tint, achieving salon-quality results effortlessly at home. Iconsign’s innovative kit offers a user-friendly solution for bold, long-lasting lashes without mascara. Follow these steps to master the process and enjoy stunning, defined lashes with professional-grade outcomes.
What is ICONSIGN Lash Tint?
ICONSIGN Lash Tint is a semi-permanent eyelash and eyebrow coloring solution designed to enhance natural beauty. This innovative DIY kit provides professional-grade results, allowing users to achieve darker, fuller lashes and brows without frequent makeup application. The tint lasts up to six weeks, making it a convenient option for those seeking long-lasting beauty solutions. The kit includes high-quality ingredients and tools, such as perm lotion, fixation lotion, and protective barrier creams, ensuring safe and effective application. Suitable for both home use and professional settings, ICONSIGN Lash Tint is a popular choice for individuals looking to save time while maintaining stunning, salon-quality lashes and brows. Its user-friendly design makes it accessible to everyone, regardless of skill level.
Benefits of Using ICONSIGN Lash Tint
Using ICONSIGN Lash Tint offers numerous benefits, making it a popular choice for beauty enthusiasts. The semi-permanent formula provides long-lasting results, typically lasting up to six weeks, eliminating the need for daily mascara application. This convenient solution saves time and effort, perfect for those with busy lifestyles. The tint enhances natural lash and brow color, creating a fuller and more defined appearance without the hassle of frequent touch-ups. Additionally, the kit is designed for safe and easy application, suitable for both home use and professional settings; It’s cost-effective, offering salon-quality results at a fraction of the price. With its innovative ingredients and user-friendly design, ICONSIGN Lash Tint is an excellent option for achieving bold, beautiful lashes and brows effortlessly.
Preparing for the Lash Tint Application
Before applying ICONSIGN Lash Tint, ensure the area is clean and free of makeup or oils. Use a gentle cleanser to prepare your lashes and surrounding skin for the tinting process.
Cleaning the Area
Properly cleaning the area is essential for successful ICONSIGN Lash Tint application. Start by gently removing any makeup, oils, or residue from your lashes and surrounding skin using a mild cleanser. This ensures the tint adheres evenly and effectively. Use a microfiber brush or pad to thoroughly clean the lash line, making sure no dirt or product residue remains. Rinse with lukewarm water and pat dry with a clean towel to maintain hygiene. A clean canvas is crucial for achieving vibrant, long-lasting results. This step also helps prevent any potential irritation or uneven tint distribution. By taking the time to cleanse the area, you set the foundation for a flawless tinting experience.
Protecting the Skin
Protecting the skin around your eyes is crucial during the ICONSIGN Lash Tint process to avoid staining or irritation. Apply a thin layer of a protective barrier cream, such as petroleum jelly or glue balm, around the eyebrows and under the eyes. This creates a shield that prevents the tint from adhering to the skin. Gently wipe away any excess cream to ensure it doesn’t interfere with the tint application. Additionally, place silicone pads or protective eye pads under the eyes to further safeguard the area. This step is vital for maintaining skin safety while achieving professional-grade results. By taking these precautions, you can enjoy a worry-free tinting experience with optimal outcomes.
Step-by-Step Application Process
Follow these steps for a flawless lash tint: mix the tint and developer, carefully apply the mixture to your lashes, and let it set for the recommended time. Use protective measures like silicone pads to prevent skin staining and ensure precise application. After processing, gently remove the tint and rinse thoroughly for professional results.
Mixing the Tint
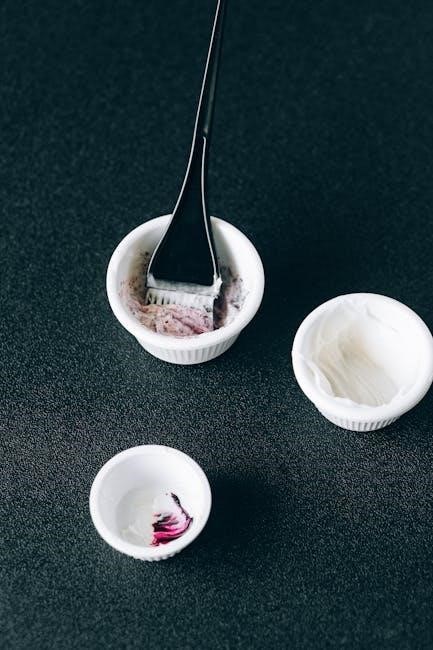
Mixing the ICONSIGN Lash Tint is a straightforward process that requires precision. Start by combining the tint and developer in a 1:1 ratio. Use a microfiber brush or pad to mix thoroughly until the solution is smooth and free of lumps. Allow the mixture to sit for 5–7 minutes to activate the tint properly. Avoid over-mixing, as this can affect the consistency and effectiveness of the tint. Ensure the area is well-ventilated and handle the mixture with care to prevent skin or eye irritation. Properly mixed tint ensures even color distribution and long-lasting results. Always follow the instructions provided with your ICONSIGN Lash Tint Kit for optimal outcomes.
Applying the Tint
Applying the ICONSIGN Lash Tint requires precision and care. Once mixed, use a microfiber brush to gently sweep the tint across your lashes, starting from the base and working toward the tips. Ensure complete coverage for an even result. Keep your eyes closed during application to avoid any tint getting into the eyes. Be careful not to apply the tint too close to the waterline or onto the skin, as this can cause staining. Allow the tint to develop for the recommended time, usually 8–10 minutes, before rinsing with warm water. Gently pat dry with a clean cloth. Avoid rubbing your eyes to maintain the tint’s longevity. Proper application ensures vibrant, professional-looking lashes.
Aftercare and Maintenance
After applying the ICONSIGN Lash Tint, avoid water and makeup for 24 hours to ensure proper adhesion. Gently clean lashes with a mild cleanser and avoid rubbing your eyes. Use oil-free products to maintain the tint’s vibrancy. Regular touch-ups every 4-6 weeks will keep your lashes looking their best.
Avoiding Water and Makeup
Avoiding Water and Makeup
To ensure the ICONSIGN Lash Tint adheres properly and lasts longer, it’s crucial to avoid water and makeup for at least 24 hours after application. Water can weaken the tint’s bond to your lashes, leading to uneven results. Similarly, applying makeup too soon can interfere with the tint’s setting process. Gently pat dry your face instead of rubbing, especially around the eye area. Use oil-free products when resuming your makeup routine to maintain the vibrancy of the tint. Avoiding these elements will help preserve the color and ensure a professional finish. Proper aftercare is key to achieving long-lasting, salon-quality results with ICONSIGN Lash Tint.
Touch-Up and Follow-Up
After the initial application, the ICONSIGN Lash Tint typically lasts up to 6 weeks. However, to maintain optimal results, you may need a touch-up as the tint fades naturally. Check your lashes after 4-5 weeks to determine if a refresh is necessary. For a touch-up, follow the same application steps as the initial process, ensuring proper preparation and aftercare. Over-tinting can damage your lashes, so only apply the tint to areas where the color has faded. Schedule regular follow-ups to keep your lashes looking vibrant and defined. Consistent maintenance will extend the life of your tint and ensure your lashes remain healthy and stunning.
Troubleshooting Common Issues

Common issues during lash tinting include uneven color, over-processing, or skin staining. To fix, gently remove excess tint with a cotton swab and rinse. For uneven results, touch up faded areas carefully. Avoid over-application to prevent damage. If irritation occurs, rinse thoroughly and discontinue use. Always follow instructions to ensure safe and effective results.
Common Mistakes and Solutions
One common mistake is not following the mixing ratio of the tint and developer, leading to uneven color or damage. Ensure a 1:1 mix and wait 5–7 minutes. Another error is insufficient preparation; always cleanse lashes and apply protective cream to avoid skin staining. If tint gets on the skin, gently blot with a damp cotton pad. Over-processing can cause dryness; stick to recommended timings. If results are patchy, touch up lightly after 24 hours. Avoid using mascara for 24 hours post-tint. For best outcomes, follow instructions precisely and perform a patch test before full application to check for sensitivity.

Additional Tips for Best Results
For optimal results, choose a shade matching your natural lash color. Consider combining lash tint with a lash lift for enhanced texture and definition.
- Always patch test 24 hours before full application.
- Avoid mascara for 24 hours post-tint;
- Moisturize lashes post-treatment to maintain health.
Choosing the Right Shade
Selecting the correct shade for your ICONSIGN Lash Tint is crucial for achieving the desired look. ICONSIGN offers a variety of shades, including black, brown, and combination tones, to suit different preferences and natural lash colors.
- Black provides the boldest, most dramatic effect, ideal for those seeking intense contrast.
- Brown is perfect for a natural, subtle enhancement, especially for lighter hair or sensitive skin.
- Combination tones blend multiple hues for a multi-dimensional appearance.
Match your shade to your skin tone and personal style for the most flattering results. If unsure, opt for a lighter shade, as it’s easier to deepen the color with a touch-up.
Combining with Other Treatments
Combining ICONSIGN Lash Tint with other treatments can enhance your overall eye beauty. For instance, pairing the tint with a lash lift creates a dramatic, lifted look. ICONSIGN’s 4-in-1 kit allows for lash lifting, perming, and tinting in one session, saving time and effort. You can also pair the tint with brow treatments, such as brow lamination or tinting, for a cohesive, polished appearance. When combining treatments, ensure proper timing and follow instructions carefully to avoid over-processing. This multi-treatment approach offers professional-grade results, making it ideal for those seeking a salon-quality finish at home or in a professional setting.
With ICONSIGN Lash Tint, achieving salon-quality results at home has never been easier. This versatile kit offers long-lasting, semi-permanent color, saving you time and effort. By following the step-by-step instructions and proper aftercare, you can enjoy bold, defined lashes for weeks. Whether you’re looking to enhance your natural beauty or prepare for a special occasion, ICONSIGN Lash Tint delivers professional-grade outcomes. For optimal results, ensure you carefully follow each step and consider combining treatments like lash lifts or brow tinting for a cohesive look. Embrace the convenience and confidence that comes with stunning, tinted lashes—your beauty routine just got a major upgrade!