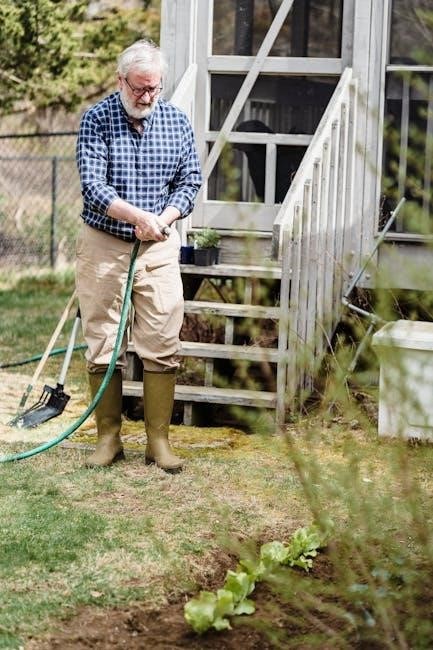
DIY Hose Guide: A Comprehensive Overview
Embark on a journey of self-sufficiency! This guide unlocks the secrets to maintaining and repairing your garden hoses, saving both time and precious resources․
Understanding Garden Hose Types
Navigating the world of garden hoses begins with recognizing the diverse options available․ Standard garden hoses, often vinyl or rubber, are your everyday workhorses, suitable for general watering tasks․ However, reinforced hoses – constructed with multiple layers of rubber and vinyl – offer superior durability and resistance to kinks, making them ideal for heavy-duty use and demanding conditions․
Beyond these basics lie specialized hoses like soaker hoses, designed to deliver water directly to plant roots, minimizing water waste and promoting healthy growth․ Sprinkler hoses, featuring tiny pores, provide a gentle, widespread spray, perfect for delicate seedlings or expansive lawns․ Understanding these distinctions empowers you to select the hose best suited to your specific gardening needs and ensures optimal performance and longevity․
Choosing the Right Hose for Your Needs
Selecting the perfect garden hose requires careful consideration of your watering demands and garden layout․ For simple tasks like filling watering cans or washing cars, a standard garden hose often suffices․ However, if you grapple with frequent kinks or require a hose that can withstand rigorous use, a reinforced hose is a worthwhile investment․
Consider hose length – measure the distance from your water source to the farthest point in your garden to avoid frustratingly short hoses․ If you prioritize efficient watering, explore soaker hoses for targeted root hydration or sprinkler hoses for broad coverage․ Don’t overlook material; rubber hoses are more durable but heavier, while vinyl hoses are lighter and more affordable․ Prioritize quality and suitability for a lasting, effective watering solution․

Standard Garden Hoses
Standard garden hoses represent the most common and economical choice for everyday watering needs․ Typically constructed from vinyl or a vinyl blend, these hoses are lightweight and easy to maneuver around the garden․ They are ideal for light-duty tasks such as watering flowers, washing patio furniture, or rinsing off tools․
However, standard hoses are generally less durable than reinforced options and are prone to kinking and cracking, especially with prolonged sun exposure․ Available in various lengths and diameters, they usually feature standard couplings compatible with most faucets and watering attachments․ While offering affordability, be prepared for potential replacements more frequently than with higher-quality alternatives․ Consider them a great starting point for casual gardeners․
Reinforced Hoses (Rubber & Vinyl)
Reinforced garden hoses offer significantly enhanced durability and longevity compared to standard vinyl options․ These hoses incorporate layers of reinforcement, typically made from rubber or a robust vinyl mesh, between the inner and outer layers․ This construction dramatically reduces kinking, bursting, and abrasion, making them suitable for more demanding tasks and heavier use․
Rubber hoses are particularly resilient and can withstand extreme temperatures, while reinforced vinyl hoses provide a balance of durability and affordability․ They are excellent choices for professional gardeners or homeowners with extensive landscaping․ Expect a higher initial investment, but the extended lifespan and reduced need for replacements often make them a cost-effective solution in the long run․
Soaker Hoses & Sprinkler Hoses
Soaker hoses and sprinkler hoses represent specialized options designed for efficient and targeted watering․ Soaker hoses, constructed from porous materials, slowly release water directly into the soil, minimizing evaporation and delivering moisture precisely to plant roots․ This makes them ideal for flowerbeds, vegetable gardens, and shrubs․
Sprinkler hoses, conversely, feature small perforations that spray water over a wider area․ They are perfect for lawns and larger garden spaces․ Both types connect to a standard garden hose and offer a water-wise alternative to traditional sprinklers․ Consider the layout of your garden and the specific watering needs of your plants when choosing between these two versatile hose types for optimal results․

Common Hose Problems & Diagnoses
Uncover the typical issues plaguing garden hoses! From frustrating leaks and stubborn kinks to troublesome coupling failures, we’ll pinpoint the source․
Leaks & Holes
Identifying the Problem: Leaks and holes are among the most frequent garden hose ailments․ They can range from pinhole punctures causing minor drips to substantial splits rendering the hose unusable․ Often, these occur due to aging, abrasion from rough surfaces, or accidental damage from tools or stepping on the hose․ Initial diagnosis involves visually inspecting the entire hose length, feeling for wet spots, and listening for hissing sounds when the water is turned on․
Common Causes: Sun exposure degrades the hose material over time, leading to brittleness and cracking․ Poor storage – leaving the hose exposed to the elements – exacerbates this․ Additionally, internal pressure combined with weakened spots can cause bursts․ Small animal teeth can also create punctures․ Addressing these issues promptly prevents water wastage and maintains optimal water pressure for your gardening tasks․ Remember, even small leaks can add up!
Kinks & Bends
The Frustration of Flow Restriction: Kinks and bends severely restrict water flow, diminishing your gardening efficiency․ These occur when the hose is sharply bent or twisted, collapsing the internal diameter and blocking the passage of water․ Repeated kinking weakens the hose material over time, potentially leading to leaks or even bursts at the bend point․ Identifying kink-prone areas is crucial for preventative measures․
Causes & Prevention: Tight turns around obstacles, improper storage, and dragging the hose across uneven terrain are primary culprits․ Using wider-radius turns, employing a hose reel, and avoiding forceful bending can significantly reduce kinking․ Consider hoses specifically designed with “kink-resistant” technology․ Regularly straightening the hose during use and after storage minimizes the risk of permanent damage and ensures consistent water delivery․
Coupling Issues (Cracked or Loose)
The Connection Breakdown: Coupling problems – whether cracked plastic or loose metal connections – are common hose failures․ Cracked couplings immediately lead to water leakage, reducing pressure and wasting water․ Loose couplings prevent a watertight seal, causing frustrating drips and potentially damaging nearby plants․ These issues often arise from over-tightening, exposure to extreme temperatures, or simply wear and tear over time․
Diagnosis & Initial Steps: Inspect couplings regularly for visible cracks or damage․ A loose coupling can often be tightened by hand, but avoid excessive force․ If the coupling is cracked, replacement is usually necessary․ Before attempting repairs, ensure the water supply is completely shut off․ Consider using pliers with a cloth to protect the coupling while tightening, preventing further damage․ Addressing these issues promptly prevents larger problems․
DIY Hose Repair Techniques
Restore and Revive! Learn practical, cost-effective methods to fix common hose problems yourself, extending the life of your gardening essential with ease․
Repairing Small Leaks with Hose Repair Tape
A Quick and Easy Fix: For pinhole leaks or small cracks, self-fusing silicone hose repair tape offers a remarkably simple solution․ Begin by ensuring the hose surface is clean and completely dry – any moisture will hinder adhesion․
Stretch the tape as you wrap it tightly around the damaged area, overlapping each layer by at least 50%․ This stretching activates the tape’s self-fusing properties, creating a waterproof seal․
Continue wrapping several layers beyond the visible leak, extending approximately two inches on either side․ The pressure from the tight wrapping is crucial for a secure bond․
Allow the tape to cure for the recommended time (usually a few minutes, check the product instructions) before resuming water flow․ This method is ideal for temporary repairs or minor damage, providing a convenient way to keep your gardening going without interruption․
Using Hose Repair Couplings
For More Significant Damage: When leaks or breaks are too extensive for tape, hose repair couplings provide a robust, long-lasting solution․ These typically involve cutting out the damaged section and replacing it with a coupling and short piece of new hose․
Select a coupling compatible with your hose’s diameter and material․ Ensure you have a sharp utility knife or hose cutter for clean, precise cuts․
After cutting, carefully insert the hose ends into the coupling, securing them with clamps or by tightening the coupling’s mechanism, depending on the type․
Properly secured couplings create a watertight seal, restoring full water pressure and functionality․ This method is more involved than tape but offers a durable repair, extending the life of your garden hose considerably․

Cutting the Hose for Coupling Installation
Precision is Key: Before attaching couplings, a clean, square cut is paramount for a secure, leak-proof connection․ Begin by marking the damaged section of the hose, extending slightly beyond the visible damage to ensure complete removal of compromised material․
Utilize a sharp utility knife or, ideally, a dedicated hose cutter․ A hose cutter provides the cleanest, most even cut, minimizing the risk of kinking or unevenness․
If using a knife, make several shallow passes rather than attempting a single deep cut․ This prevents the hose from collapsing and ensures a straighter line․
Discard the damaged section and carefully inspect the remaining hose ends for any fraying or irregularities․ Smooth any rough edges for optimal coupling fit․
Attaching the Couplings
Secure the Connection: With the hose cleanly cut, it’s time to attach the repair couplings․ Begin by sliding the clamp(s) over one end of the hose – these are crucial for a watertight seal․ Next, firmly push the coupling onto the hose, ensuring it’s seated completely and evenly․
Position the clamp(s) directly over the coupling, tightening them securely with a screwdriver․ Avoid over-tightening, as this can damage the hose․ Repeat this process on the other end of the hose section․
Double-check that both couplings are firmly attached and the clamps are snug․ A gentle tug on the hose will confirm a secure connection․
Finally, test for leaks by briefly turning on the water supply․
Patching Holes with Rubber Patches & Cement
A Durable Fix: For small punctures or holes, a rubber patch and cement offer a reliable repair․ Begin by thoroughly cleaning the area around the damage with soap and water, then drying it completely․ Lightly roughen the surface with sandpaper to create a better bonding surface for the cement․
Apply a thin, even layer of rubber cement to both the patch and the area surrounding the hole․ Allow the cement to become tacky – usually a few minutes – before carefully applying the patch․
Press the patch firmly onto the hose, ensuring it fully covers the damaged area․ Use a clamp or weight to hold it in place while the cement cures, typically for 24 hours․
Test the repair with water․
Extending Hose Length
Reach Further with Ease! Connectors seamlessly join hoses, while reels offer tidy management, ensuring your garden receives water wherever it’s needed efficiently․
Using Hose Connectors
Seamlessly bridge the gap between hoses with reliable connectors! These essential components allow you to extend your reach without compromising water pressure․ When selecting connectors, prioritize durability and a secure fit to prevent frustrating leaks during operation․
Various types are available, including straight connectors for simple extensions, and angled connectors for navigating tight spaces; Before connecting, ensure both hose ends are clean and free of debris for optimal sealing․
Tighten the connectors firmly by hand, avoiding excessive force that could damage the fittings․ For added security, consider using Teflon tape on the threads to create a watertight seal․ Regularly inspect connectors for wear and tear, replacing them as needed to maintain a consistent and efficient watering system․ Properly installed connectors are key to a hassle-free gardening experience!
Employing Hose Reels for Management
Tame the tangle and extend the life of your garden hose with a quality reel! Hose reels offer a convenient and organized solution for storing lengthy hoses, preventing kinks, twists, and potential damage․ Available in various materials – plastic, metal, and even wood – choose a reel that suits your needs and aesthetic preferences․
Wall-mounted reels save space, while portable reels offer flexibility․ When winding, avoid over-tightening, as this can stress the hose material․ Regularly check the reel’s mechanism for smooth operation and lubricate if necessary․
Proper hose management not only protects your investment but also simplifies your gardening routine․ A well-maintained hose reel ensures your watering tool is always ready for action, promoting a tidy and efficient garden space; Consider automatic rewind options for ultimate convenience!

Hose Maintenance & Prevention
Proactive care is key! Consistent inspection, proper storage, and mindful use dramatically extend your hose’s lifespan, preventing costly repairs and replacements․
Proper Storage Techniques
Protecting your investment begins with mindful storage․ After each use, completely drain the hose to prevent freezing and bacterial growth․ Avoid leaving it kinked or twisted, as this weakens the material over time․
Ideally, store your hose on a reel or neatly coiled in a sheltered location, away from direct sunlight and extreme temperatures․ UV exposure degrades the hose’s rubber or vinyl, shortening its lifespan․
A garage, shed, or covered patio are excellent choices․ If outdoor storage is unavoidable, consider a hose cover to shield it from the elements․ Regularly check for any signs of damage during storage, addressing minor issues before they escalate into major problems․ Proper coiling prevents frustrating tangles and ensures your hose is ready for its next task!
Avoiding Kinks & Twists
Kinks and twists are the bane of any gardener’s existence! To minimize these frustrations, choose a hose with a kink-resistant design․ When unrolling, avoid sudden jerks or forceful pulling, which can create sharp bends․
Instead, gently guide the hose across your yard, allowing it to naturally follow the terrain․ Utilize hose guides or stakes to maintain a smooth path and prevent tight turns․
After use, take the time to carefully coil the hose, avoiding any overlapping or twisting․ A large-diameter coil is less prone to kinking than a small, tight one․ Proper handling significantly extends the hose’s life and ensures a consistent water flow, making your gardening tasks more enjoyable and efficient․

Winterizing Your Garden Hose
Protect your investment from freezing temperatures! Before the first frost, disconnect the hose from the spigot and completely drain all remaining water․ Any water left inside can freeze, expand, and cause cracks or bursts, rendering the hose useless․
Coil the hose loosely and store it in a sheltered location, such as a garage, shed, or basement, away from direct sunlight and extreme cold․ Avoid storing it directly on concrete floors, as this can accelerate deterioration․
Consider using a hose reel for organized storage․ Proper winterization ensures your hose is ready for action when spring arrives, saving you the cost of replacement and guaranteeing a long lifespan․